Wednesday, 28 March 2012

ECW Musketeers - WIP

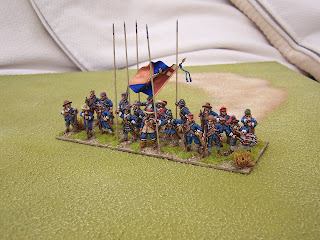
Musketeers are coming along nicely. I've done a few in different coat colours and will do the same for both Royalist and Parliament. Then the variations will be added (loading, preparing to fire ...) It will be some time before these are based and ready to go! 


My Painting Method

A little bit about my painting method now using the musketeers as an example. This is how I tackled the box of musketeers I had undercoated/ prepared some time ago (or part of it so far.)
I nearly always undercoat large batches in one go. They are then ready whenever I need them. It always makes me want to paint them when they look like this!


Could seem a daunting prospect to paint all these!

Firstly, I work in groups of 4 figs when painting units. I paint the first stage on the first 4 figs - in my case this is the matt black on metal work etc. I follow this with a dry brush of Vallejo Oily Steel on the metal work.

I rarely complete the 4 figs straight through (unless needed to complete a unit or something like that)but start on the next batch of 4 and so on. This means I eventually have lots of groups of 4 figs at different stages. The stages being,
 base colours (socks, trousers,belts, flesh, hats, bags ...)
 highlights on base colours
 coats (then coat highlights)
 fine detailing and final highlights where necessary.


Musketeers at various stages

This means I'm never doing the same thing on lots of figures but am varying the painting and for me this keeps me at it for longer. Some stages require more concentration than others (i.e. fine highlighting) so this method allows for various degrees of intensity and concentration. Doing fine detail on 20-24 figs one after another in one go would probably blow my mind.

I find doing figs in groups of 4 prevents me from getting 'bogged down' and also I can choose the stage and level of detail depending on how I feel. Personally I lke doing all the detailed stuff first  thing in the day. As the day goes on and I start to tire I can do easy stuff like the block colours on belts etc or the large areas like coats ... (I do batches of undercoating during my breaks in the day!)

Some pics of the musketeers as they progress to the fininishing stage:


Matt black painted first then drybrushed Vallejo Oily Steel (those in foreground.)


Detail and highlights added at different stages


Close-up of detail


Various stages shown here including a couple of coats done before a had a cuppa!


  Coats added on these last 2 pics (after my cuppa!)


Nearing completion:


Coats added and 'grey coats' highlighted


All coats highlighted - these just need some final touches to complete them.

Last photos show 4 greencoats that I base coated yesterday and finished this morning - so please don't touch as they are still wet!!


With the next 4 ready for their green coats


Hope this all makes sense!


This last photo leads me to the next posting. I've been preparing and painting quite alot of Sedgemoor cavalry.  The ones on the left in pic below were prepared yesterday so I'll get them going today.


Next time - some Sedgemoor cavalry.

Tuesday, 20 March 2012

Saxon Fyrd

A unit of fyrd from my 1066 Saxon army. Crusader Miniatures painted from a black undercoat.

The matt black undercoat is Revel no 6. This was recommended to me, some years ago, by the very talented painter Andrew Taylor (Scotland.) It dries incredibly flat and very quickly. What I do is thin it quite heavily with Humbrol thinners and give the figures a heavy wash - this dries very matt and allows all the detail to stand out and, as with my brown undercoat method, makes all the detail easy to see and paint. I'll post a short step through and pics when I revisit the Saxons and Normans later this year as I have a large Norman army to paint!!

Some LBM shield transfers used here and there.


Tuesday, 13 March 2012

Gerard's Blue Coats - ECW

I found a box of undercoated ECW musketeers in the firing position so decided to tackle them next. I need to find the other castings I have in other firing line positions - loading, preparing to fire - to make the regiment a little more varied. I also need to find suitable pikemen for a regiment in action. I bought quite a few Renegade ECW regiments early on in their offers so just need to locate them. Meantime I’ll push on with the musketeers.


 Figs are Bicorne and Renegade Miniatures - all undercoated and ready to go.


Started to add the main detail colours.

As the box of undercoated musketeers has lots of figs in it (all firing) I’ll probably paint the detail on most of these as I go along as they’ll do for other regiments - and just leave the coat colour till last. I’ll do about 8 in each coat colour and add the other firing positions in later.

I’ve decided to paint them as Gerard’s Blue coats, a Royalist regiment. I already have a completed regiment of Gerard’s 'at ease' (see below.) This completed regiment has given me the incentive to do another but in the firing position.


So far all my ECW regiments are ‘at ease’ and, as I said earlier, are based on the ‘Victory without Quarter’ rules by Quindia Studios. I intend, as far as current castings go, to repeat these regiments but in different positions – firing line, marching, advancing. I’ll also do some other regiments to add to the stock I have.

Each regiment is made up of 3 bases each 60 x 60mm. Each base has around 6 figs on it (2 bases of musketeers and one of pike/ command.) See pics below to see how it works.
(Also, visit the Quindia Studios site and look at the Articles and ECW Gallery - this is where I got my inspiration from! See link on right.)


An idea of the basing composition

Although all regiments are the same size/ ratio of pike to musket it works well for me at this stage. Like many people I like the idea/ visual effect of large pike blocks but my table size and the fact I like to paint lots of smaller regiments (for variety) means I’m happy the way the regiments look. I can easily increase the size of the regiments by painting more bases of figures should I need to do so.

Blue used was Vallejo Prussian Blue highlighted with various amounts of Vallejo Blue Grey.
Some more pics:


Now that my Sedgemoor stuff is well underway I feel comfortable in side-stepping/ dabbling in other periods as the blog develops. This allows me variety and also gets me looking at other boxes of stuff I have to do. It also provides a break from painting 'red'.

Flag by GMB Flags.


Monday, 5 March 2012

1st Foot Guards 2nd Battalion 1685

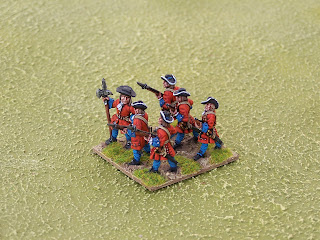
Here is my final battalion of the King's Foot at Sedgemoor 1685 (apart from the Wiltshire Militia.)
This is the second battalion of 1st Regiment of Foot Guards.

Firstly a close up then the usual shots.


As mentioned previously I need to complete the genadier companies for all the regiments. I've stated them and will continue to paint bits as I go along. (Kirke's grenadiers already done!)

Also, the three Guards regiments were larger in number than the other regiments so, in time, I'll be adding more musketeer companies to the Guards units to get the proportions correct.